Getting started with Google Analytics
What is Google Analytics?
It is a resource of google that helps you understand the performance of your website and is used to install a tracking code in your website.
So what are the features of it?
It gives you information on your website traffic details, traffic resources, the ways the traffic lead to your website, the amount of visitors, the time that they spend in your website, which all pages they visited, whether it was an organic visit or not, whether they reached your website through direct URL click, what keyword a person used to search for your website, or did a person reach our website through a referral link or through an ad and so on.
Steps in installing google analytics for our site
- Copy your blog URL .
- Take a new tab and type in 'www.google.com/analytics' and sign into it.
- Once in, click on 'Start measuring'.
Then you have three options to set up:
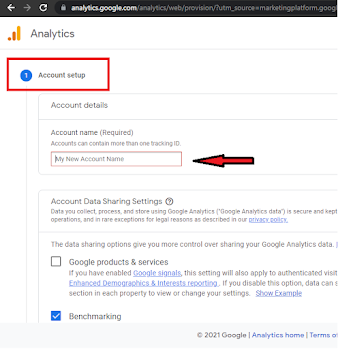
Account set up
-'Account name' will be the name of your website in analytics.
-Once given, check the options provided below and click on your favoured ones (like google products and services etc) and then click 'Next'.
Property set up
-In this set up, add 'Property name'
-Then click on a ' Reporting time zone' and 'Currency'.
{Always ensure that your time zone and website location you want (for eg: for a client in Canada) are the same as google analytics displays the statistics accordingly}
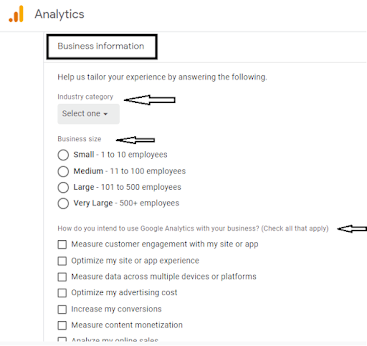
About your business
-In this option, you get to choose your 'Industry category' (which is the category you want your website to be classified into), 'Business size' ( ie, the number of people employed, for eg, in your company for the website .The next options are certain benefits provided by analytics which can be selected if required.
-Next, click 'Create'.
Then you get a pop up of the 'Terms and conditions agreement' which is different for different countries and depends on the one you select. By clicking on 'I agree', you will be taken to 'My email communications'. Click on required options (like performance updates and suggestions etc).
Then you reach the analytics page for your site and account.
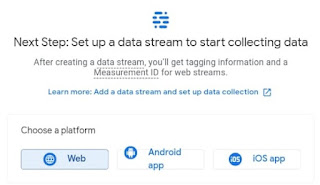
Among the three options available (web, android app, IOS app),click on any one that you want.
If you click on WEB , you will get the option to 'Create stream' (before which don't forget to copy your blog URL and give a 'Stream name').
Click on the option 'Tagging instructions' to copy the tracking code into your website HTML code region.
Several other features are provided like real time option where we get see the live visits and the location etc.


Comments
Post a Comment